JoyStick Shield Module Robotics Control for Arduino (Analog keyboard and mouse function)
Joystick Shield Game Robotics Controller Module Extension Board For Arduino
Categories: Modules, Robotic Control and Modules
Description
Description:
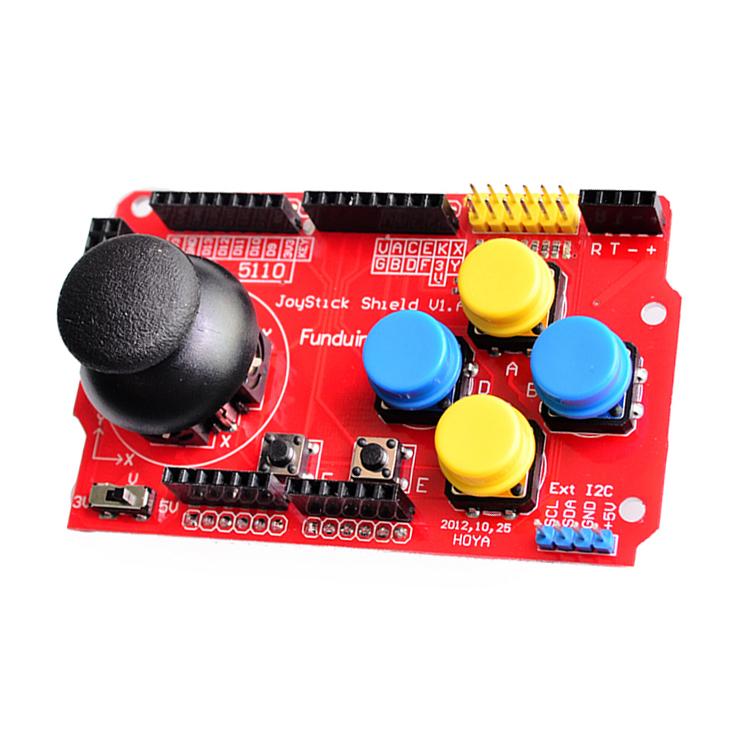
Joystick Shield Module Robotics Control for Arduino
Arduino joystick shield board. The shield sits on top of your Arduino and turns it into a simple controller; Application: Good for DIY projects; Other: Connection method: XY axis–A0 A1, joystick select button–Digital IO 7, Red LED button–Digital IO 3, Green LED button–Digital IO 4, Blue LED button–Digital IO 5, Yellow LED button–Digital IO 6; Extension port: Bluetooth & wireless APC220 port; Packing List: 1x Joystick Shield Module.
Joystick Interfaces:
- NRF24L01 RF interface
- for Nokia 5110 LCD interface, so it is very easy to develop the game.
- I2C interface, add I2C communication interface, easy connectivity to I2C devices
- Convenient Bluetooth wireless serial communication
- for one PS2 joystick, JoyStick Shield with a PS2 cross joystick with buttons, there are four round buttons, 2 small buttons.provides for Arduino joysticks and expansion input buttons.
- working voltage: 3.3V or 5V eg. STM32, On-board switches can go from 3.3V to 5V, you can use this model for other 3.3V microcontroller platforms, such as STM32.
Operational Details:
- For all versions of arduino Main board, 2009, UNO, mega 1280, mega 2560
- Sample code is provided
- Direct intake on board puzzle
- Five momentary buttons (4 + joystick selection button, just like the play station 3 analog stick push button)
- Two-axis thumb joystick
- The buttons are connected to Arduino digital pin 2-6; the relative pin will be low when a certain button is pressed. Joystick Y-Axis movement will produce a proportional analog voltage on the analog pin 0, while, Joystick Axis X motion will produce an analog signal on the analog pin 1.
Reviews (0)
Be the first to review “JoyStick Shield Module Robotics Control for Arduino (Analog keyboard and mouse function)” Cancel reply
You must be logged in to post a review.
Shipping & Delivery
Related products
(OV5647) Raspberry Pi Night Vision Camera Module
Arduino Pro Mini – 3.3V/8MHz, 5V/16MHz (ATMEGA328)
Features:
• ATmega328 running at 8MHz with external resonator (0.5% tolerance) • Low-voltage board needs no interfacing circuitry to popular 3.3V devices and modules (GPS, accelerometers, sensors, etc) • USB connection off board • Supports auto-reset • 3.3V regulator • Reverse polarity protected • DC input 3.3V up to 12V • On board Power and Status LEDsAtmega32u4 Esplora Joystick Game Programming Module
Overview:
Microcontroller: ATmega32u4 Operating Voltage: 5V Flash Memory: 32 KB of which 4 KB used by bootloader SRAM: 2.5 KB EEPROM: 1 KB Clock Speed: 16 MHz The board contains everything needed to support the microcontroller; simply connect it to a computer with a USB cable to get started. The Esplora has built-in USB communication; it can appear to a connected computer as a mouse or keyboard, in addition to a virtual (CDC) serial / COM port. This has other implications for the behavior of the board. Arduino DIY Experiment is mainly used for kids toys,science kits for 10 year old kids, steam kit on high school, primary school, secondary school, cool science experiments.AVR Board UNO Plus Onboard MCU Atmega328P-AU Compatible With Arduino
GLT240128-WB (LCD Graphic RS 232 BLU/WHT)
Full touch screen, no keypad needed! Our Graphic LCD Touch Panel provides you with a cost effective user interface solution for that great product/project you are developing. On board memory for Fonts and Bitmaps! This touch screen graphic LCD displays graphics and text in any font, style, justification and language, all with the convenience of a touch screen.
The Serial LCD Controller combines a 240 x 128 graphic LCD display a resistive touch screen, so you can get started creating powerful, simple user interfaces.
Leonardo R3 Development Board ATMEGA32U4
Product specifications:
• Controller: ATmega32u4 • Work record: 16 MHz • Working voltage: 5V • Input voltage (recommended): 7-12V • Digital IO port: 20 • PWM channel: 7 • Analog input: 12 • 5V digital / analog port maximum allowable current: 40 mA • 3.3V digital / analog port maximum allowable current: 50 mA • Flash Memory: 32 KB (ATmega32u4) of which 4 KB used by bootloader • SRAM: 2.5 KB (ATmega32u4) • EEPROM: 1 KB (ATmega32u4)U-BLOX NEO-6M module (GY-GPS6MV2)
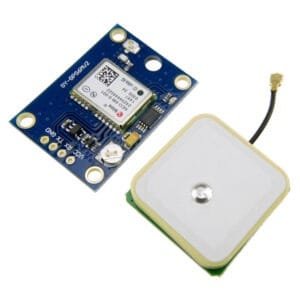
This GPS is a very capable GPS for the price and size. Compatible with UART capable devices including Arduino, Raspberry Pi, MSP430, and MSP432.
Power the module and it will automatically acquire satellite signals and a position fix. Once it has a position fix the module will blink the on board LED. This LED will continue to blink while the module has a position fix.
The Product contains the following parts;
- 1 — u-blox NEO-6M GY-GPS6MV2 GPS module with on board EEPROM
- 1 — GPS antenna
- 1 — 1x4 male header
uLCD-32PTU-Pi (3.2″ Raspberry Pi Display Module for the Raspberry Pi A, B and B+)
| Manufacturer | 4D Systems |
| Type of display | TFT |
| Screen size | 3.2" |
| Display resolution | 240x320 |
| Supply voltage | 5V DC |
| Contrast | 450:1 |
| Luminosity | 250cd/m2 |
| No. of colours | 65k |
| Window dimensions (H x W) | 48.6 x 64.8mm |
| Dimensions | 56.32 x 92.19 x 15.9mm |
| Kind of display | graphical |
| Microcontroller | PICASO |
| Series | Raspberry Pi |
| Viewing angle | 150° |


Reviews
There are no reviews yet.